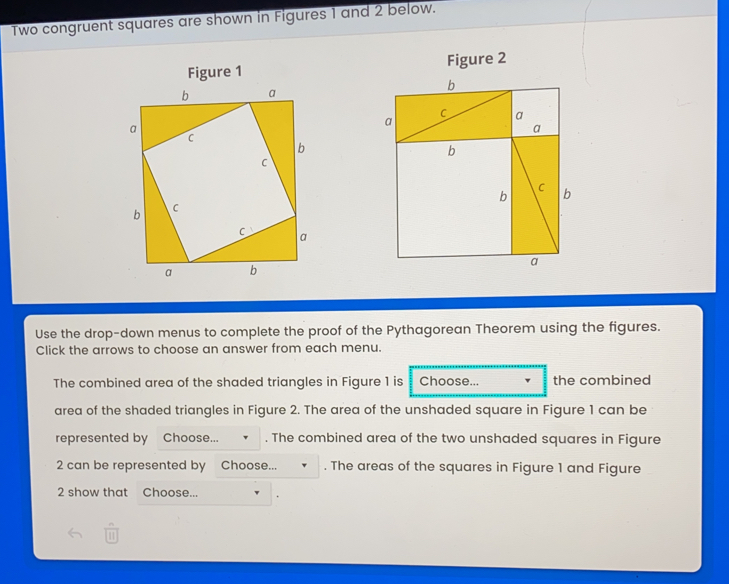
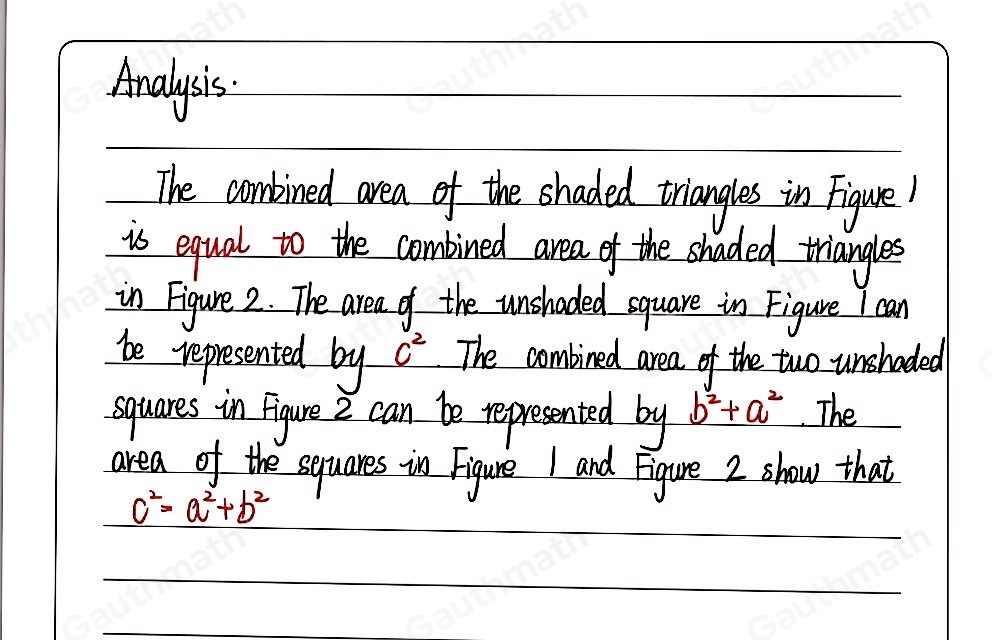
Two congruent squares are shown in Figures 1 and 2 below. Figure 1 Figure 2 Use the drop-down menus to complete the proof of the Pythagorean Theorem using the figures. Click the arrows to choose an answer from each menu. The combined area of the shaded triangles in Figure 1 is Choose... the combined area of the shaded triangles in Figure 2. The area of the unshaded square in Figure 1 can be represented by Choose... . The combined area of the two unshaded squares in Figure 2 can be represented by Choose... ¥ . The areas of the squares in Figure 1 and Figure 2 show that Choose...